Third Quarter Final-Due 3/27
Your next project is a "whatever you want project." As before, you must meet certain requirements.
- Must be a US Paper size document (in Photoshop) (1pt)
- Must include one picture you took (1pt)
- Must use an adjustment layer (dark gray and light gray half circle) (1 pt)
- Must use a layer mask (light gray rectangle with dark gray dot) (1pt)
- Must use liquify, clone stamp, or warp tool (1 pt)
- Must work on it everyday (4 pts)
- Must include written description (copy and paste from weebly) (1pt)
Monsters In Motion
We will be creating an animated GIF that shows us slowly morphing into a monster!
The pictures for the demo are below. We are using Jenny McCarthy because she is a monster.
The pictures for the demo are below. We are using Jenny McCarthy because she is a monster.


Guidelines for Monsters in Motion:
- You will begin by opening an 8 x 10 inch, 300 resolution, document in Photoshop.
- Take a "selfie" in Photobooth, drag it into Photoshop. Resize the picture, but DO NOT DISTORT IT.
- Your monster may look like almost any kind of monster you want to make. Do not use the same images that we used in the class demonstration, and do not make the exact same kind of monster we already made.
- After each step, save a JPEG in a folder. You must have at least 20 different steps (something must change in every step). On the last day of this project we will make our monsters into animated GIFs.
- You may make your monster look like a zombie, demon, vampire, werewolf, ghost, or any other sort of monster you can imagine.
- You may use any photos online to combine with your photo to make a monster, including: animal parts (horns, teeth, eyes), textures (bark, peeling paint, rust, lichen), skulls.
- Do not use existing pictures of monsters to make your monster.
- In the class demonstration, we did not clean up our edges while we worked to save time. In your own projects, your edges should look smooth and clean. Take the time to make your layer masks look good. Sloppy work is not acceptable.
- Use any of the techniques we covered in the demonstration: blending modes, color adjustments, image warping, removing facial features, adding animal features, liquify adjustments, changing background, etc.
- You will need to include: one layer mask, one layer with a blending mode, one layer with a color adjustment and mask applied, use of the clone stamp tool somewhere, use of the liquify tool somewhere, use of transform>warp somewhere, an added feature (from an animal, insect, etc.).
|
Steps to create a GIF:
|
To save as a GIF:
|
If you are finished and you are not missing any work for this class, choose one of the tutorials to complete below:

Pretty Planets and NASA Conspiracies

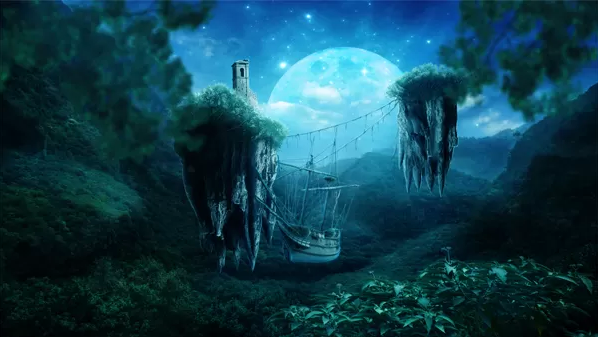
This picture is not an example of what we will be doing, but it's funny. LOL. I wish I knew who the original artist was. Sorry I can't tell you.
|
We are going to take a break from self portraits for a minute and talk about... pictures of outer space!
Below are some links that we will look at and talk about in class: |

|

|
Tips for taking texture pictures for planets:
- think about the scale of the picture vs. the scale of the planet. A picture of grass will not work.
- look for textures on walls, on floors, on door, etc.
- these are close-up pictures! get the camera close to the subject!
- blurry pictures are a no!
- take at least 10-15 pictures PER PERSON!
Checklist for Space Project:
- Stars are white (layers are clipped)
- Nebula (at least 1)
- At least three planets
- One planet has all three options from tutorial
- All of the planet textures are manipulated enough that you can not tell it started with a picture of a carpet, shirt, brick, etc. (no obvious patterns)
- Pictures of planet textures are not blurry
- Planets are not egg shaped
- Planets have spherical distortion applied
- Planets have inner glow/ outer glow/ inner shadow
Distorted Self Portraits, Part 2

|
In a small group, view the presentation (link below) and answer the questions highlighted in green. Choose one person in your group to record your responses. We will talk about these questions in class to prepare us for out next project.
Presentation: http://prezi.com/6t8nsz3et-ns/?utm_campaign=share&utm_medium=copy |
To begin your portrait:
- Make a new file File > New and choose U.S. Paper
- Now drag your picture in and make sure it fills all the white space. HOLD the SHIFT KEY
- Press Enter.
- Control-click the picture layer and choose Rasterize layer.
- Delete the background of the picture, leaving your head and shoulders.
- Control-click the picture layer and choose Duplicate layer.
- Go to Filter > Liquify and make your distortions. See Below for prompts.
- Save a JPG of every distortion you make.
Here are the prompts for manipulations of self portraits, you may take as many pictures as you need using Photo Booth, and you will make all of the following distortions using only the liquify tool. Save all of your versions as JPEGs and post them on your Weebly site as a Photo Gallery (go to the multimedia tab at the top). Label each of the pictures in the Caption option in the Gallery Element. Make 10-12 different images using the following manipulations:
- Using the last question from your worksheet, make the change to your face that you wanted to make. (ex. If you wished you had a smaller nose, make your nose smaller.)
- Using the last question from your worksheet, exaggerate the feature you wanted to change. (ex. If you wished you had a smaller nose, make your nose bigger.)
- Make yourself look cuter. (hint: bigger eyes and smaller features may help, or a more innocent expression)
- Make yourself look evil, scary, or demonic.
- Make yourself look more like an animal (snail, shark, horse, cat, dog, frog, etc.) You may look up animals online for a reference.
- Displace at least one of your features (move one part of your face to another part, without smudging the original feature.)
- Change the emotion of your face. (ex. If you look happy in the picture, make yourself sad or angry.)
- Change your hairstyle.
- Also do 2-4 other distortions/manipulations of your choice.
Benchmarks:
- Each image is labeled.
- Your distortion must be clear from your original image. (Viewers should be able to tell that it is not just a photograph, it looks different from you.)
- Your distortion is not excessively smeared. (Don't overdo it, it should still look like a photo when you are done just not like your real face, see pictures below.)
- Use the pucker tool in the liquify filter.
- Use the bloat tool in the liquify filter.
- Use the forward warp tool in the liquify filter.
|
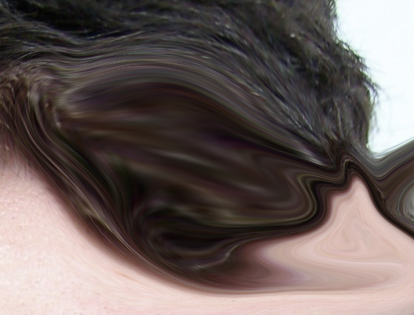
This distortion is too smeared (If your picture looks like this, try again):
|
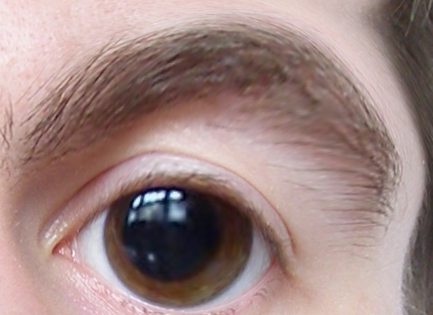
This distortion is okay. It is a little blurry, but it is not overdone:
|
Distorted Warhol
|
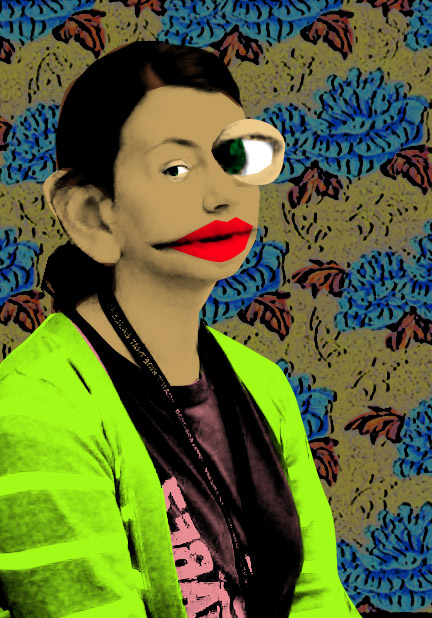
We will combining a few tools and techniques in Photoshop to create this look, inspired by Pop artist Andy Warhol.
Andy Warhol is famous for his serigraphs of pop icons like Marilyn Monroe, and everyday household items, like the Campbell's Soup can. Serigraphy, also known as silkscreening or screen-printing, is the process of producing an image, or serigraph, by pressing color though a fabric stencil comprised of porous and non-porous sections. Below is the link for the Warhol effect tutorial. Note that Photoshop will look a bit different than what we are used to because the tutorial uses an older version of Photoshop. http://www.pxleyes.com/tutorial/photoshop/1377/How-To-Create-An-Andy-Warhol-Serigraphy-Effect.html
|


|
Steps for first part of project:
|
For the "Andy Warhol Effect" tutorial:
http://www.pxleyes.com/tutorial/photoshop/1377/How-To-Create-An-Andy-Warhol-Serigraphy-Effect.html
To create the background:
|
Hoax Photography
"With great (Photoshop) power comes great responsibility"

|
Long before there was Photoshop, people have been manipulating photography to alter the truth. With the invention of digital editing programs like Photoshop, coupled with the massive platform which is the internet, the "truth" gets stretched farther, and more often, than ever before.
This is the presentation we will look at to get us started: http://prezi.com/vcmna4gtytuc/?utm_campaign=share&utm_medium=copy&rc=ex0share You can read about the first-ever faked photograph here. And watch an interesting music video about being Photoshopped here. If you are a fan of Lena Dunham, here is an interesting article about her Vogue photo shoot, although it is definitely one-sided. Here is the opposing viewpoint, along with the before and after photos. Go here for more inspiration, and to take some hoax quizzes, if you feel up to it: http://www.museumofhoaxes.com/hoax/photo_database |
Some recurring Photoshop hoax themes are based in cryptozoology, celebrity/beauty, and politics/photojournalism. These categories are broad, and there are certainly more. You will be creating your own hoax using Photoshop. The hoax is up to you, but it must include at least one picture you take with the camera. You also have to create the hoax yourself- for example, if you are going to do a cryptozoology hoax, you have to create the creature yourself- no using an already existing hoax or monster/thing from a movie or television show. You also CAN NOT create a hoax that will tarnish anyone's reputation- no mean girls rumor starting. Let say this too- nothing that will get you arrested or sent to Guantanamo. Your hoax can be fun or serious. Its up to you. You can look here for inspiration, and take a hoax quiz here.
Hoax project due Wednesday, 2/5
Hoax Benchmarks 15pts:
Hoax Benchmarks 15pts:
- On a US Paper size document (can be landscape or portrait) (1a.) 1 pt.
- Hoax is original (you did not just copy something from the internet) (4a.)(4b.) 2 pts.
- Used appropriate Photoshop tools as necessary, to make Hoax look believable (may use 1b., 1k., 1p., 1q., 1t., 1aa., 1dd.) 5 pts.
- Used at least one picture of your own (1e.)(4a.) 1 pt.
- Written explanation of hoax, and what tools were used, posted with project on weebly (5a., 11a.) 2 pts.
- Worked on project everyday 4pts.
